AI game modding: build Minecraft mechanics in GTA V
Learn how AI game modding connects Minecraft and GTA V. Follow the source-based setup, test one mechanic, and adapt the workflow to other games.
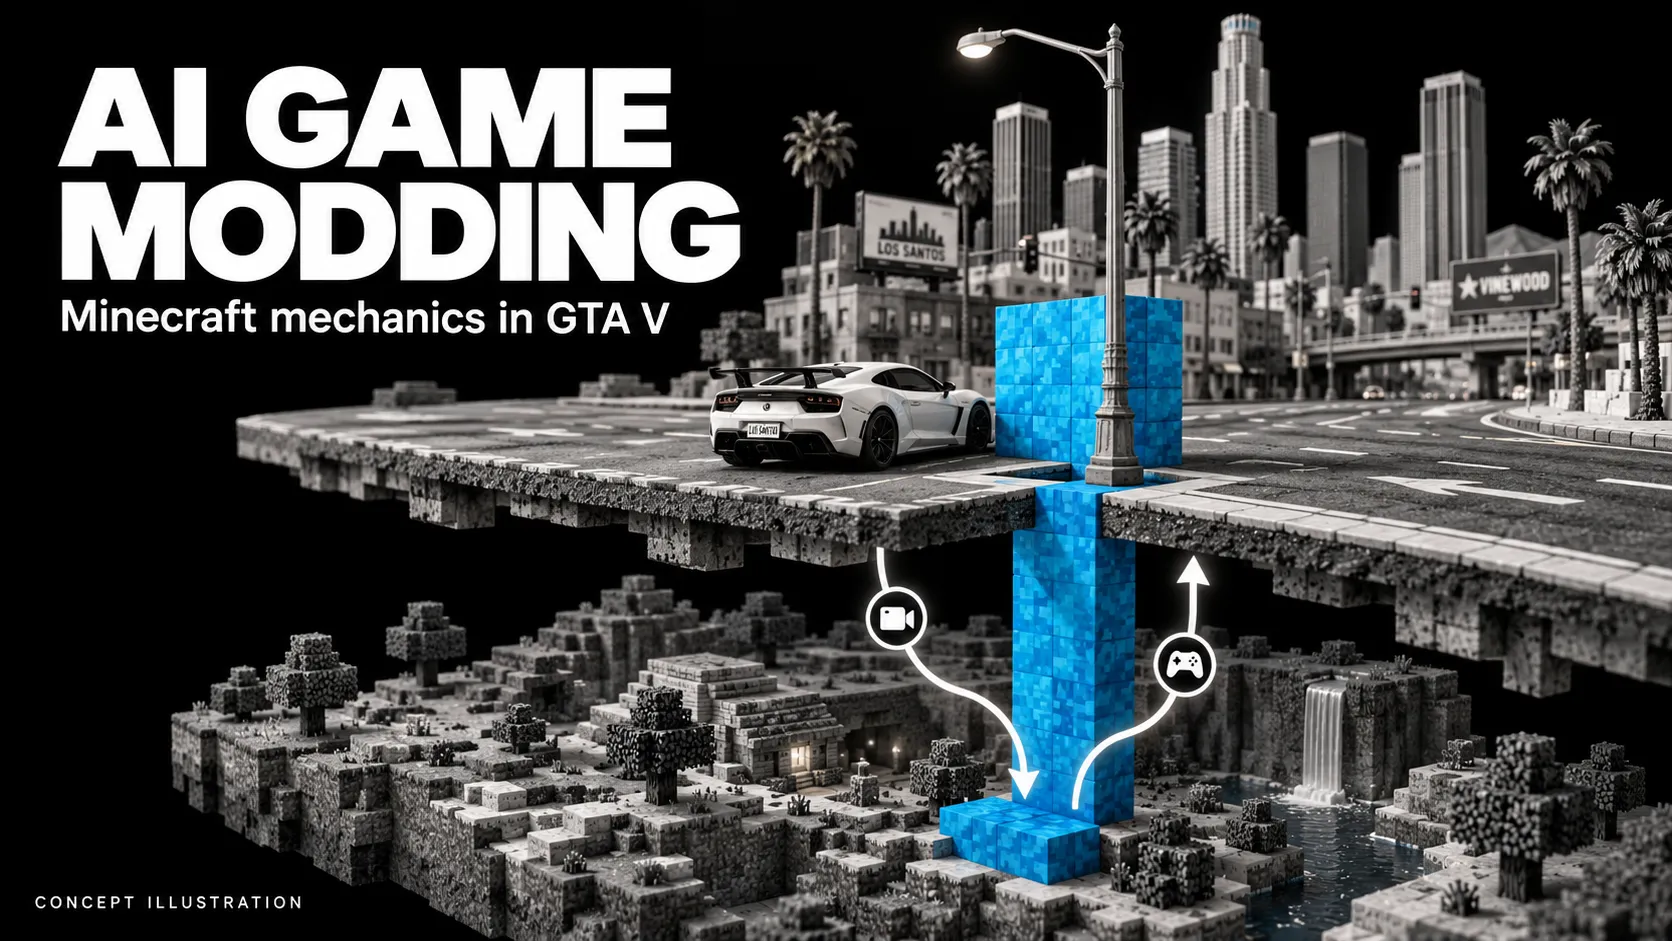
A Minecraft block appears in Los Santos. The interesting test is what happens when a car reaches it.
Does the car stop? Can a GTA building hide the block? Does the block stay attached to the same spot when the camera turns?
Those questions led me into the source behind the recent AI game modding demos. The public projects show several ways to create a crossover: write new rules through a mod loader, recreate mechanics inside the host game, or connect two games that keep running separately.
For this tutorial, I chose the documented Minecraft x GTA V passthrough example in Rehan’s Universal Modder repository. It runs Minecraft Java alongside GTA V Story Mode, exchanging state and combining their rendered output. The following steps explain how to reproduce that setup and extend it one mechanic at a time. Project source and setup.
This is a source-reviewed walkthrough. I have not built or played this mod myself. The project’s reported demonstrations and hardware checks remain the authors’ results.
How are people creating these game modes?
A game mode changes the rules of play. A mod supplies the code, data, or assets that make those rules possible. The toolchain depends on the game. Before asking an AI agent to build anything, identify the extension point it can actually use.
| Approach | What the creator changes | Public example |
|---|---|---|
| Loader-based content | Items, projectiles, enemies, and world hooks through an existing API | The Universal Modder Terraria example uses tModLoader |
| Data and asset mod | Unit definitions, technology, graphics, and scenarios | Its Age of Empires II example combines a data mod with generated unit art |
| Native mechanics | Code inside one game’s mod recreates selected mechanics | GrandTheftMinecraft implements block building and other Minecraft-style features through GTA objects and scripts |
| Two-game bridge | Separate games exchange position, collision, input, and other state | The Minecraft x GTA V passthrough example |
| Server game mode | Client and server scripts define a shared play session | FiveM resources and game types |
These are documented routes, with different amounts of integration work. The Terraria field note, AoE II field note, and FiveM scripting guide show how those approaches differ.
The two GTA projects are especially easy to confuse. GrandTheftMinecraft is a C++ ScriptHookV mod with a GTA block-model pack. The passthrough example runs a real Minecraft client beside GTA. Their dependencies, controls, and installation steps are different.
Universal Modder packages instructions, command-line tools, and field notes for a coding agent. Its workflow starts with identifying the game and choosing a route, then moves through a working slice, assets where needed, and verification. The authors credit Claude Code for the GTA example. That attribution does not establish that a particular model is required to reproduce it. Toolkit overview.
What does the Minecraft x GTA bridge actually do?
The bridge has a Minecraft Fabric mod, a GTA ScriptHookV plugin, and a ReShade compositor. GTA supplies the host scene and camera. Minecraft supplies its own blocks, inventory, and simulation. Small messages carry state and events; shared memory carries the heavier image data.
The implementation has four connections:
- Camera and input. GTA sends the camera pose, player position, and selected controls to Minecraft over a local WebSocket.
- World contact. GTA ground probes become invisible Minecraft barriers. Placed Minecraft blocks become invisible GTA collision props.
- Rendering. Minecraft exports world colour and depth, plus a separate hand/HUD layer. ReShade combines these with GTA’s frame, comparing depth so objects can hide one another.
- Interactions. Minecraft events trigger corresponding GTA actions, such as an explosion or projectile hit.
The coordinate conversion uses one GTA metre per Minecraft block. Position maps from GTA (x, y, z) to Minecraft (x, z + yOffset, -y). That offset aligns the ground. Camera timing and depth conversion make the visual connection much harder than drawing a hotbar. Architecture and implementation files.
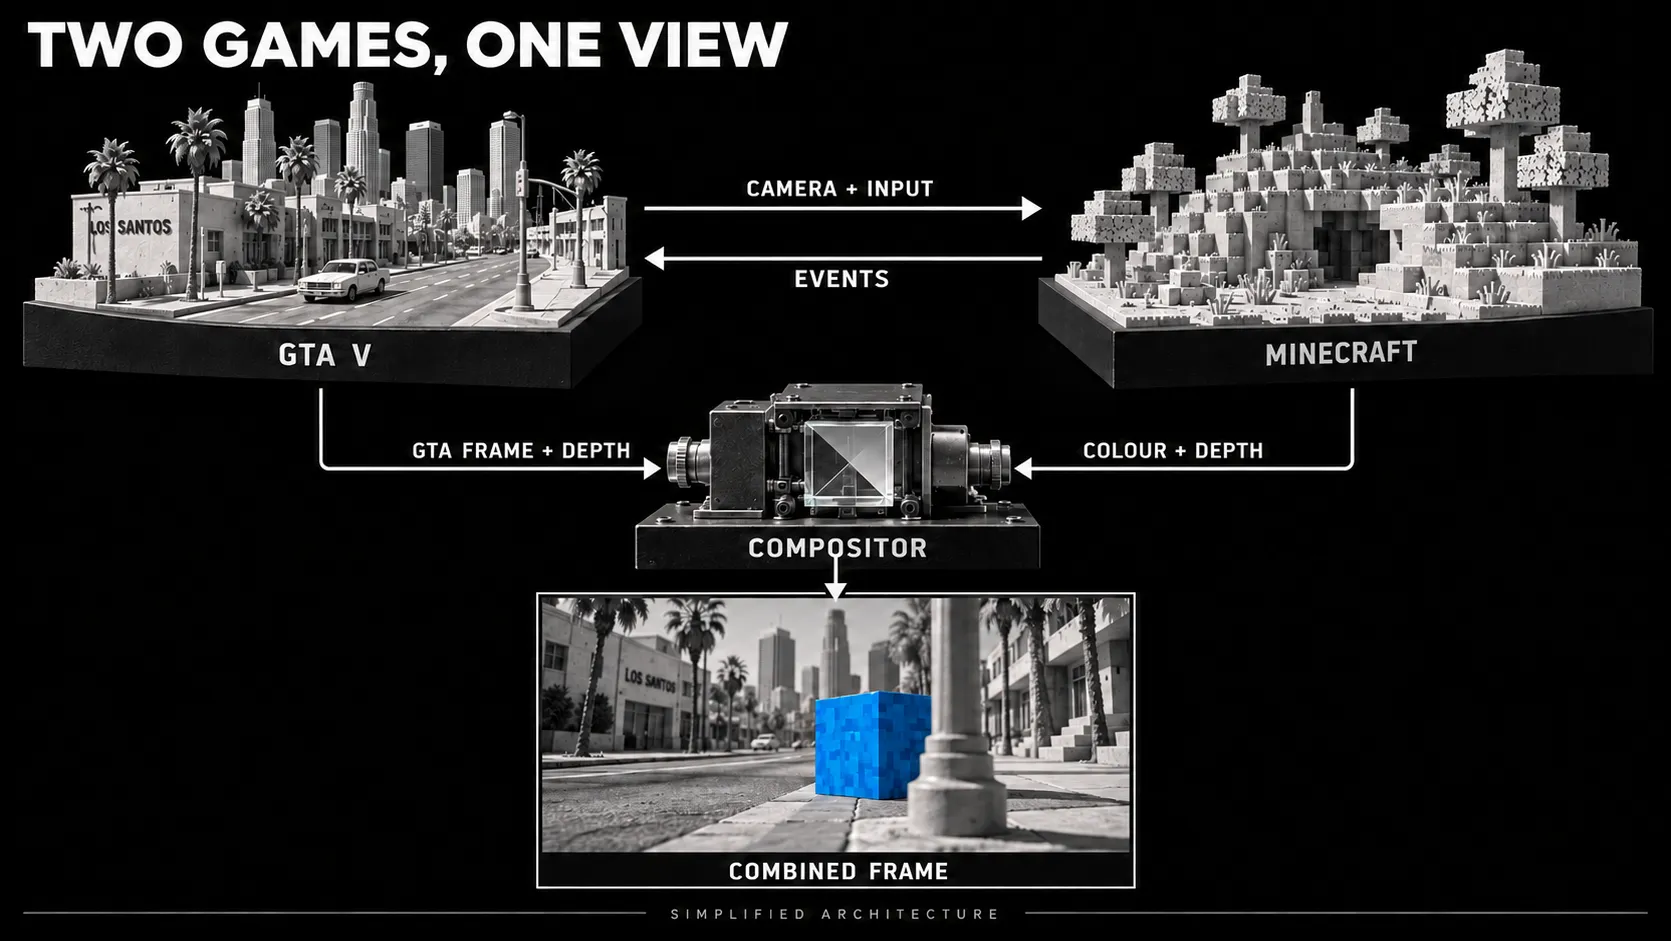
Simplified bridge architecture. State travels between the games, while frame and depth inputs feed the compositor. Concept illustration.
Step-by-step: reproduce the Minecraft-in-GTA workflow
1. Choose one result to reproduce
Start with this acceptance test:
Place one Minecraft block on a GTA street. Walk around it. Check that it stays aligned, disappears correctly behind a GTA object, and blocks a nearby GTA pedestrian or vehicle.
That tests rendering, camera sync, and collision. It gives an AI coding agent a concrete target before adding flight, mobs, or elaborate scenes.
Create a MODLOG.md in your working folder. Record the repository commit, game builds, dependencies, changes, and observations. A short clip is useful evidence, but logs and repeatable actions explain what produced it.
2. Match the documented environment
The published baseline is specific:
| Component | Documented baseline |
|---|---|
| Platform | Windows 10/11 with WSL for the supplied shell-script route |
| Host game | GTA V Legacy, Steam, build 3889, Story Mode |
| GTA loader | ScriptHookV compatible with the installed GTA build, with its ASI loader |
| Compositor | ReShade 6.8.0 with add-on support |
| Guest game | Minecraft Java Edition 26.3 |
| Minecraft loader/API | Fabric Loader 0.19.5 and Fabric API 0.161.0+26.3 |
| Build tools | Windows JDK 25; Visual Studio 2022 or newer with x64 C++ desktop tools |
| Host test tools | Windows Python 3.12 with websockets, numpy, and Pillow |
Have Git, rsync, curl, and unzip available in WSL. Use legitimate installations of both games and a separate Minecraft launcher profile. Back up GTA saves and existing loader/ReShade configuration before installation.
This example does not support GTA V Enhanced. Run the documented Story Mode setup with BattlEye disabled; keep the modified installation out of GTA Online. ScriptHookV’s author also specifies that the tool does not work in GTA Online.
The project requirements are the compatibility reference, rather than whichever versions happen to be newest.
3. Get a fixed source snapshot and set paths
Run these commands in a WSL Bash terminal, from a development folder of your choice:
git clone https://github.com/rehan-remade/universal-modder
cd universal-modder
git checkout --detach c1344415ef5721fd6ce45bf3b99c2bbe8fe4db96
cd examples/minecraft-gta5-passthrough
Use a new, dedicated Windows working directory. The following paths are examples: replace the JDK and GTA locations with your own.
export PASSTHROUGH_WIN_DIR='C:\dev\mc-gta-lab'
export PASSTHROUGH_JDK='C:\Tools\jdk-25'
export PASSTHROUGH_MC_DIR='C:\dev\mc-gta-lab\mcgame'
export GTA_DIR='D:\Games\GTAV-Legacy'
Keep these exports in the same terminal for subsequent WSL commands. The build helpers mirror files into mc and gta subfolders using rsync --delete, so those destinations must be disposable build folders.
If using a coding agent, open it in this checkout and give it the first task:
Read the Minecraft x GTA V example and its field note. Compare the required versions with my installed tools. Explain the camera, collision, frame, and event paths. Make a plan to reproduce one placed block, with a separate check for each path. List mismatches before proposing changes.
Pinning the commit fixes the reviewed source. It does not freeze every external dependency: fetch_deps.sh discovers ScriptHookV downloads from the current official page, some shader includes use a live branch, and the Minecraft build specifies a Loom snapshot. Record what the build retrieves and check compatibility before installing. Dependency downloader, Gradle properties.
4. Build the Minecraft half
From the example directory in WSL, run:
./gradle.sh buildThe wrapper builds in the Windows mirror using your Windows JDK. At this snapshot, the expected JAR is C:\dev\mc-gta-lab\mc\build\libs\passthrough-0.1.0.jar.
Create a Minecraft 26.3 launcher installation with Fabric Loader and its own game directory matching PASSTHROUGH_MC_DIR. Put the matching Fabric API JAR in that profile’s mods folder. Then run:
./gradle.sh installThis builds and copies the passthrough mod into that profile. Launch the profile normally. The mod creates and opens a void creative world and changes rendering options, which is why it belongs in its own game directory. Leave the window open rather than minimized. Build wrapper.
5. Build the GTA half, then test the bridge separately
In the same WSL example directory:
gta/fetch_deps.sh
gta/build.sh
The expected plugin is C:\dev\mc-gta-lab\gta\build\MCPassthrough.asi.
Before involving GTA, use the synthetic host. In a Windows terminal, create an isolated Python environment and install the test dependencies:
py -3.12 -m venv C:\dev\mc-gta-lab\pyenv
C:\dev\mc-gta-lab\pyenv\Scripts\python.exe -m pip install websockets numpy Pillow
Change that Windows terminal into the example’s host folder in your checkout. With only the Minecraft profile running, run:
C:\dev\mc-gta-lab\pyenv\Scripts\python.exe .\fakehost.py 12 C:\dev\mc-gta-lab\fakehost_out fpInspect its output images. The synthetic scene has known ground and a host-only pillar, so it can expose alignment and occlusion errors. The repository also includes a D3D11 fakegta test host, with separate ReShade setup instructions.
These checks isolate parts of the bridge. They do not establish that collision or rendering works in a real GTA session. Test-host documentation.
6. Review the installer and enter Story Mode
Close both games before changing the game folder. Read gta/install.sh and back up the files it touches, especially an existing ReShadePreset.ini. At this snapshot, that preset is overwritten on installation and deleted on removal. The script’s conflict checks do not protect every existing file.
After checking the target path and backups, run from WSL:
gta/install.shIf it reports a conflicting loader or launch-arguments file, inspect the conflict. Keep the existing mod setup intact until you understand how they coexist. Installer source.
For the first real run, use the documented 1920x1080 windowed setup, disable pause on focus loss, and turn depth of field off. Start the Minecraft profile and GTA with BattlEye off, then select Story Mode yourself. The example connects automatically; F7 toggles the passthrough and F8 re-levels the ground.
7. Check one placed block before adding features
Select the grass-block hotbar slot, right-click to place, and left-click to break. Walking and the camera remain GTA controls while the plugin forwards Minecraft actions.
Check each part of the first acceptance test:
- Alignment: the block stays fixed when you turn and strafe.
- Occlusion: a GTA object in front hides the appropriate part of the block.
- Collision: a GTA pedestrian or vehicle reacts to the placed wall.
- Recovery: stop and restart each side, then check what reconnects and what remains.
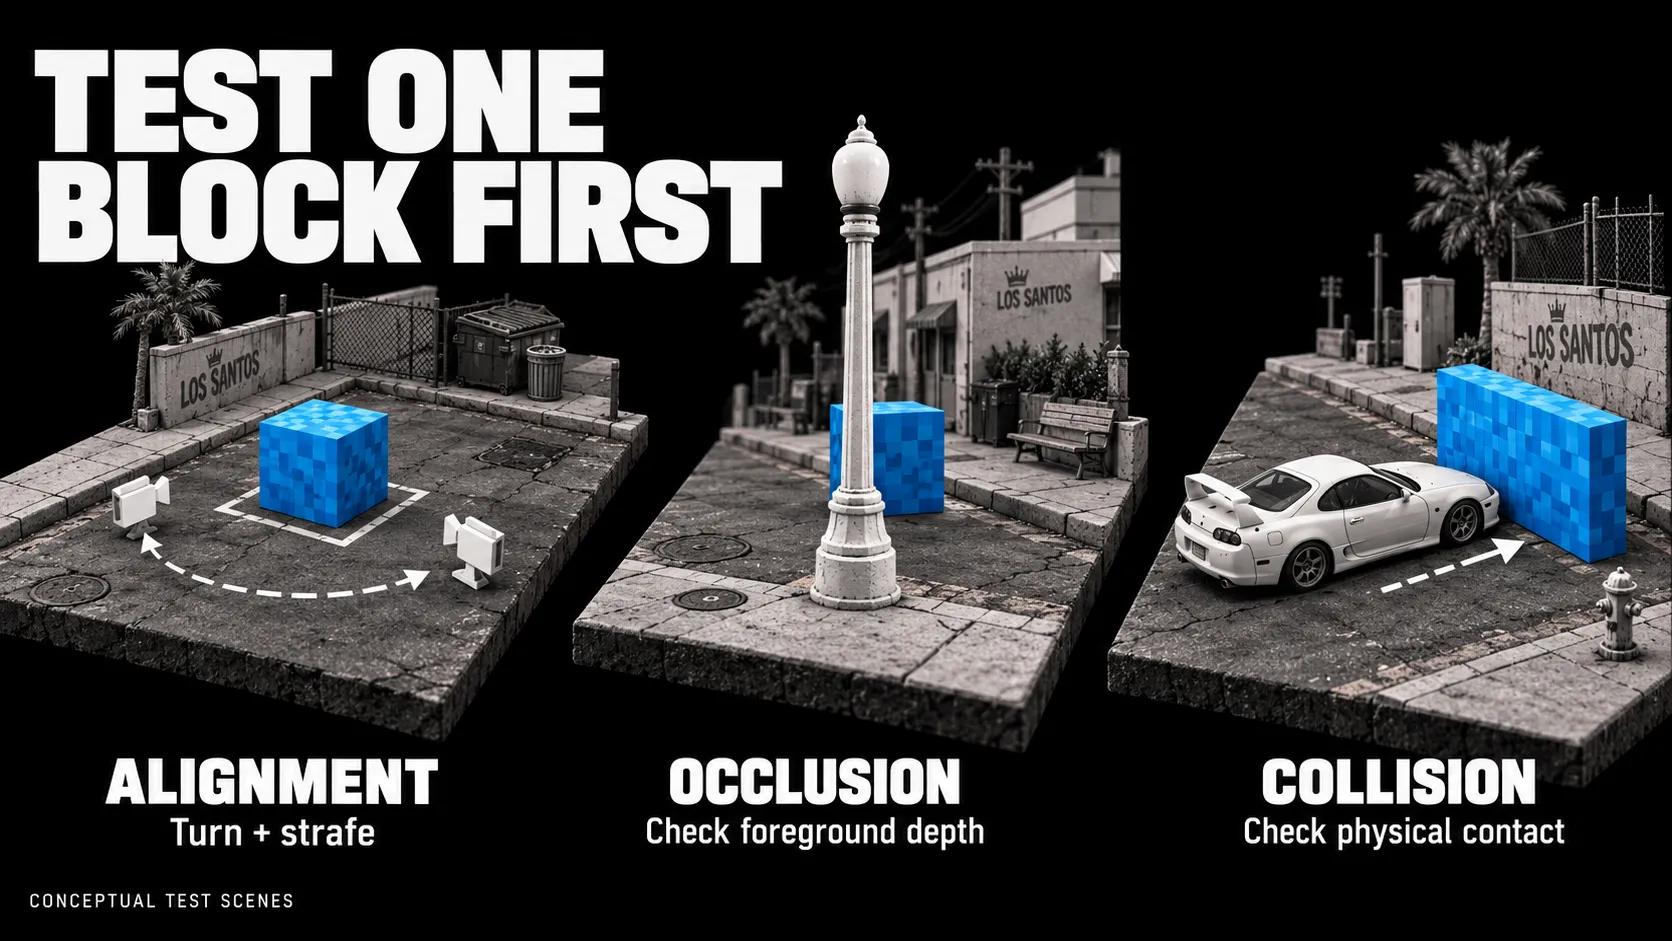
Three checks for the first placed block: alignment, occlusion, and collision. These are conceptual test scenes, not recorded results.
Capture the same location and camera movement for each revision. Log failures separately. A correctly drawn block does not establish that its collision prop exists.
The implementation caps collision props and performs GPU readback and texture upload while running two games. Hardware cost depends on the scene, settings, and machine. I would measure frame time and responsiveness locally before increasing resolution or block counts.
8. Add interactions one at a time
The source includes TNT, projectiles, ender pearls, flight, and mob interactions. Extend the validated block scene with one of these at a time. For TNT, check both the Minecraft explosion and the corresponding GTA effect before moving on.
Give the coding agent a bounded task:
Read the explosion event path on both sides of this pinned example. Propose one change, name the affected files, and define a test in an isolated Story Mode scene. Preserve block placement and camera alignment. Report separately what compiled, what the synthetic host showed, and what was observed in GTA.
This keeps the skill’s instructions separate from the agent doing the work. The loader and game APIs execute the mechanic; the agent helps inspect, edit, build, and investigate it.
9. Record the working configuration and restore cleanly
Save the commit, dependency versions, launch settings, logs, and a repeatable test sequence. Include the observed defects in the handoff.
The field note describes a one-frame pose lag, but the reviewed compositor defaults to zero. Measure the setting that fits your capture. It also documents a stale Minecraft overlay on GTA’s pause menu; the showcase cut around that issue. Neither deserves to disappear from a reproduction report. Field notes and open questions.
The repository provides gta/install.sh --remove. Compare its file list with your backups before using it, then restore your previous configuration. Removal is not a complete rollback of overwritten presets. The documented save helper also touches discovered save profiles; this walkthrough does not require it.
Keep the bridge local. Its WebSocket binds to 127.0.0.1:25599 without authentication, so other local programs can issue commands. Close the test client when finished. For sharing, package your original mod code and instructions with the required licences and credits; leave commercial game files and extracted assets out.
How does this transfer to other games?
The reusable part is the method: find an extension point, define which system owns each behaviour, build a small slice, and verify the connection. The GTA-specific plugin, coordinate mapping, collision logic, and renderer integration need replacement for a different host.
Chasm’s SkyCraft provides another documented design: a Skyrim SKSE plugin and Minecraft Fabric mod exchange state, while Skyrim renders the result. Its design is useful prior art, with its own requirements and limitations.
For a new Terraria weapon, tModLoader may supply the necessary hooks directly. For an AoE II unit, the job may be data and sprite preparation. For a shared GTA game mode, start with FiveM’s resource and server model. Choose the simplest route that supplies the required behaviour.
AI can reduce the effort of reading APIs, writing adapters, and diagnosing a broken build. The result still depends on a real extension point and a test inside the game. That is the part of this wave I find useful: a creator can investigate a strange idea through small, inspectable changes.
Frequently asked questions
Does AI merge the GTA and Minecraft engines?
In the passthrough example, both games keep running. Mods exchange state and combine rendered output. GrandTheftMinecraft takes a different route by implementing selected mechanics inside GTA.
Can I follow these steps with GTA V Enhanced?
The reviewed example supports GTA V Legacy. Its field notes identify Enhanced as requiring a different rendering/compositor path. Treat that as a separate engineering project.
Do I need AI-generated art or a paid image service?
The GTA passthrough field note reports no generated assets for the example. Other projects use generated sprites or models, but asset generation is not required to reproduce this bridge.
Does a successful build prove the mode works?
A successful build establishes that the code compiled in that environment. Synthetic tests examine parts of the integration. Real-game checks are still needed for rendering, input, collision, interactions, and recovery.
How long will replication take?
The creator reports about two days of AI-assisted development with a human directing the original build. That is a report about one project, not a setup-time promise. Your installed versions, tools, and existing mods determine how much troubleshooting is needed.
Newsletter
New notes, in your inbox.
Get each new article from the workbench by email. No spam, unsubscribe anytime.
Related reading
Continue through the system.
-
SEO Skill Suite: how I turn an audit into a work plan
My SEO Skill Suite connects keyword research, page checks, technical audits, and AI visibility. See the workflow, real findings, and its limits.
Read article → -
Claude Code in Production: Build Apps Without Vibe Coding
Use Claude Code in production with a one-page PRD, vertical task slices, test gates, and release checks. A practical app-build workflow.
Read article → -
Marketing System Build: Keeping Strategy Alive Through Delivery
A case study of the 19-document marketing system I built to carry strategy, research, and brand rules from intake to published content.
Read article →